What is the installation process of a Warp Beam Dyeing Machine?
Nov 27, 2025
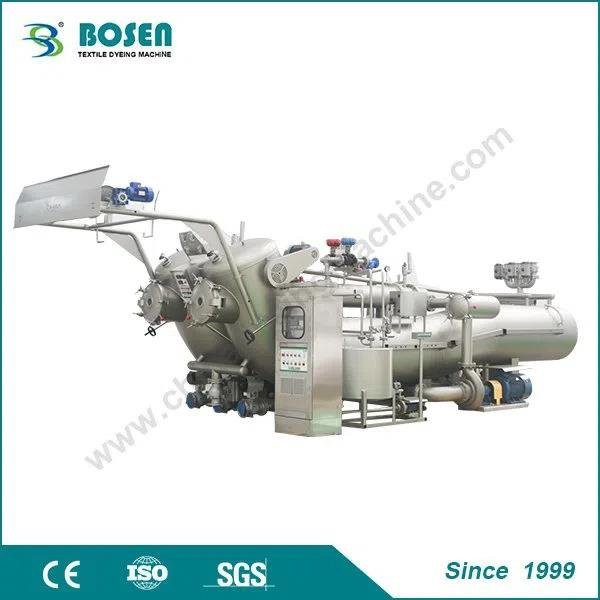
The installation process of a Warp Beam Dyeing Machine is a critical and intricate procedure that requires careful planning, precise execution, and strict adherence to safety and operational standards. As a leading supplier of Warp Beam Dyeing Machines, I am well - versed in the steps involved in this installation process, and I'm here to share detailed insights.
Pre - installation Preparation
Before the actual installation of the Warp Beam Dyeing Machine begins, a series of preparatory steps are essential. First and foremost, site selection is crucial. The installation area should be spacious enough to accommodate the machine and allow for easy access for maintenance and operation. It should have a flat and stable floor that can bear the weight of the machine. The floor must be leveled to within a specified tolerance to ensure the proper functioning of the machine and prevent any mechanical stress due to unevenness.
The site should also have proper ventilation. Since the dyeing process involves the use of chemicals and high temperatures, good ventilation helps to remove fumes and maintain a safe working environment. Adequate electrical, water, and steam connections are necessary. The electrical supply should meet the machine's power requirements, with proper grounding to prevent electrical hazards. Water connections need to be of sufficient capacity and pressure to ensure a continuous supply for the dyeing process. Steam connections are required for heating the dye bath, and they should be installed according to the machine's specifications.
Another important aspect of pre - installation preparation is the inspection of the machine components. When the Warp Beam Dyeing Machine is delivered to the site, a thorough inspection of all parts should be carried out. Check for any signs of damage during transit, such as dents, scratches, or loose parts. Ensure that all components are present as per the delivery list. This inspection helps to identify any issues early on and allows for timely replacement or repair of damaged parts.

Machine Assembly
Once the site is prepared and the components are inspected, the machine assembly process can begin. Start by unpacking the main parts of the Warp Beam Dyeing Machine. The main body of the machine is usually the first part to be installed. It should be carefully placed on the prepared floor and aligned according to the installation markings. Use appropriate lifting equipment, such as cranes or forklifts, to handle the heavy parts safely.
Next, install the dyeing chambers. These chambers are where the warp beams are placed for the dyeing process. They need to be properly sealed to prevent any leakage of the dye bath. Connect the pipes and valves for the dye bath circulation system. The circulation system is responsible for ensuring that the dye is evenly distributed around the warp beams. Make sure all the connections are tight and leak - free.
The heating system is another crucial component. Install the steam coils or electric heaters according to the machine's design. Connect the steam or electrical supply to the heating elements, and test the heating system to ensure that it can reach and maintain the required temperature for the dyeing process.
The control panel is the nerve center of the Warp Beam Dyeing Machine. Mount the control panel in a convenient location where the operator can easily access it. Connect all the electrical wires from the various components of the machine to the control panel. This includes connections for the motors, sensors, and heating elements. Ensure that the wiring is properly labeled and organized to facilitate future maintenance.
Connection of Auxiliary Equipment
In addition to the main machine components, several auxiliary equipment need to be connected. The water treatment system is an important part. It helps to purify the water used in the dyeing process, removing impurities that could affect the quality of the dyeing. Connect the water treatment system to the main water supply and the dyeing machine.
The chemical dosing system is used to add the required dyes and chemicals to the dye bath. Install the chemical storage tanks and connect them to the dosing pumps. The dosing pumps should be calibrated to ensure accurate dosing of the chemicals. This is crucial for achieving consistent dyeing results.
The exhaust system is responsible for removing the fumes generated during the dyeing process. Connect the exhaust ducts from the dyeing chambers to the exhaust fan. The exhaust fan should be powerful enough to effectively remove the fumes from the working area.
Testing and Commissioning
After the machine is assembled and all the auxiliary equipment is connected, a series of tests are required before the Warp Beam Dyeing Machine can be put into full - scale operation. Start with a dry run of the machine. This involves running the motors and pumps without any dye or water to check for any mechanical issues. Listen for any abnormal noises, vibrations, or malfunctions. Check the movement of all the moving parts, such as the warp beam holders and the circulation pumps.
Next, conduct a water test. Fill the dyeing chambers with water and run the circulation system. Check for any leaks in the pipes, valves, and chambers. Monitor the water flow rate and pressure to ensure that they are within the specified range. Test the heating system by heating the water to the required temperature. Check the temperature control to ensure that it can accurately maintain the set temperature.
The chemical dosing system should also be tested. Add a small amount of a test chemical to the dye bath and check if the dosing pump is working correctly. Measure the amount of chemical added to ensure accurate dosing.
Once all the individual components have been tested, conduct a full - scale test with a sample warp beam. Run the dyeing process from start to finish, following the standard operating procedures. Monitor the dyeing results, such as color uniformity and fastness. Make any necessary adjustments to the machine settings, such as temperature, time, and chemical dosage, to achieve the desired results.
Training and Support
After the successful commissioning of the Warp Beam Dyeing Machine, it is important to provide training to the operators. Training should cover all aspects of the machine's operation, including how to load and unload the warp beams, how to set the dyeing parameters, and how to perform basic maintenance tasks. Provide the operators with a detailed user manual that includes all the technical specifications, operating procedures, and troubleshooting guides.
As a supplier, we also offer ongoing support to our customers. This includes regular maintenance services, supply of spare parts, and technical advice. We understand that any downtime of the Warp Beam Dyeing Machine can cause significant losses to our customers, so we strive to provide prompt and efficient support.
If you are interested in our Warp Beam Dyeing Machines or need more information about the installation process, please feel free to contact us for further discussion. We also offer other types of dyeing machines, such as the Soft Flow & Jet Flow High Temperature Dyeing Machine, Liquid Flow & Jet HT Dyeing Machine, and HTHP Beam Dyeing Machine. Our team of experts is ready to assist you in finding the most suitable dyeing solution for your needs.
References
- Textile Dyeing Machinery Handbook.
- Industry standards for Warp Beam Dyeing Machine installation.